Applies To: ThreatSync+ NDR, ThreatSync+ SaaS
Policies in ThreatSync+ are tied to network zones. Policies use zones to identify a set of sources and destinations used to filter traffic. A zone can be a group of IP addresses, assets, organizations, countries, domains, or localities. Zones are classified as either Internal or External.
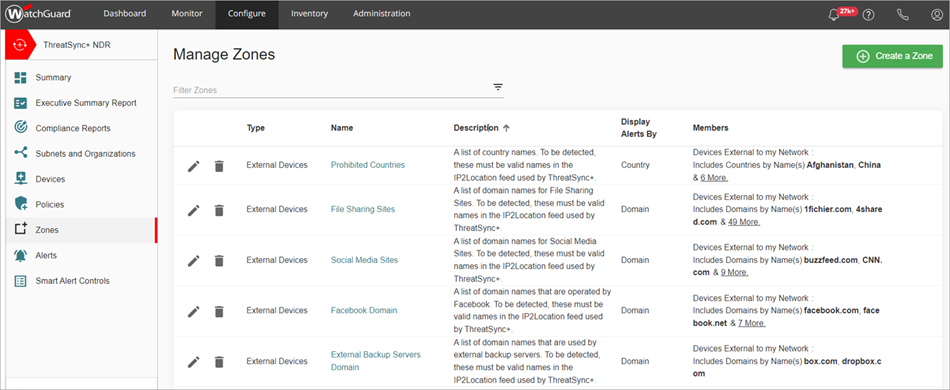
On the Manage Zones page, you can view a list of all the zones in your network. This list includes default zones and zones you add manually. For more information about default zones, go to Default Policies and Zones.

The zone list shows these columns:
- Type — The type of zone. For example, internal or external devices.
- Name — Name of the zone. Click the zone name to view details of the zone.
- Description — A description of the zone that includes guidance about how the zone is detected.
- Display Alerts By — How policy alerts are organized and presented on the Policy Alerts and Policy Alerts Details page. For example, if you select country in a destination zone, the policy alerts are grouped by country that the traffic was directed to, and the policy alerts and charts are also grouped by country.
- Members — Members of the zone. For example, members can include domains by name, or devices with a specific tag.
Add a ThreatSync+ Zone
To add a custom zone, from WatchGuard Cloud:
- Select Configure > ThreatSync+ > Zones.
The Manage Zones page opens. - Click Create a Zone.
The Create a New Zone page opens. - In the Name and Description section, in the Zone name text box, enter a name for your zone.
- In the Description text box, enter a description.
- Click the Zone Definition section to expand it.
- Select either Devices on my Internal Network or Devices External to my Network.
- From the Display Alerts by drop-down list, select a category to organize and present your policy alerts.
- Select Begin with an Empty Zone, Begin with a zone containing all Internal Devices (if you selected Devices on my Internal Network in Step 6), or Begin with a zone containing all External Devices (if you selected Devices External to my Network in Step 6).
- Click Add Rule.
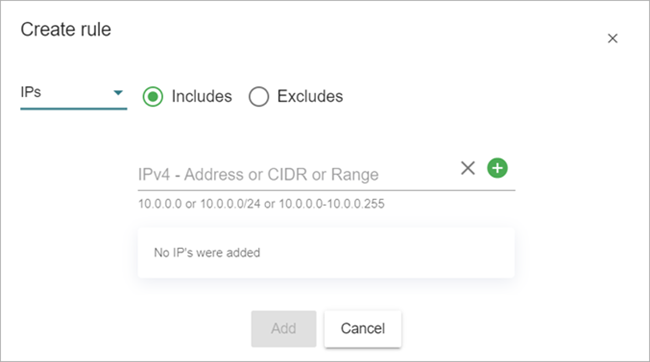
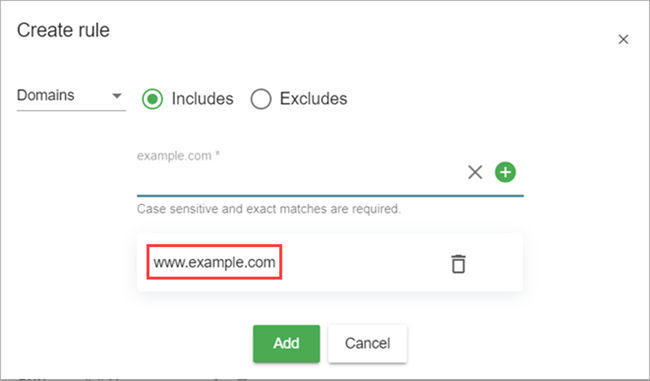
The Create Rule dialog box opens.

- Select one of these options from the drop-down list:
- Countries
- Domains
- IPs
- Localities
- Organizations
- Select either Includes or Excludes.
- Enter the rule properties to include or exclude. For example, for a domain, enter a website address.

- Click
 . To add another value to this Includes or Excludes rule, enter the value and click
  again.
 - Click Add.
- Click Save.
Edit a ThreatSync+ Zone
You can edit a zone that you added manually or edit a default zone.
When you edit a default zone, WatchGuard Cloud saves a new copy of the zone with your changes, and all policies that used the original default zone now use the new copy. If you delete the copy, the changes you made to the zone definition are discarded and the zone reverts back to the original default zone. This affects the operation of all policies that use that zone.
System upgrades can make changes to default zones. If you have not made any edits to default zones, system upgrades that change default zones will affect your account. However, If you have edited a default zone, any updates to the definition of the original default zone are not visible in your account until you delete your copy.
To edit a ThreatSync+ zone:
- On the Manage Zones page, click
 next to the zone you want to edit.
The Edit Zone page opens with the Manage tab selected by default. - On the Overview tab, you can view a summary of the zone details.
- On the Manage tab, you can make changes to the zone definition or associated rule.
- Click Save.
- The Policies tab shows a list of policies used by the zone. Click
 to edit the policy, or click New Policy to add a new policy.
For more information, go to Configure ThreatSync+ Policies.